Project Info
This project did not submit a demo video on Devpost.
Inspiration
We both had solo traveling experiences and found ourselves pretty much always eating alone on our solo trips. We wondered if we could build an app that helps us connect with others who are also solo travelers to eat together.
What it does
This is a web app that contains a form which the user submits to get a list of potential matches that are in close proximity to them and have similar food preferences as them as well.
How we built it
We built it using Firebase, React and Javascript.
Challenges we ran into
I haven't really worked with Javascript before so this is my first time using Javascript and there was a learning curve in the beginning however after reading some documentation, I was able to get up to speed pretty quickly.
Accomplishments we're proud of
We were able to learn fast and reiterate quickly on our idea.
What we learned
Writing a simple design doc helped us coordinate and be clear on what each of us was working on respectively.
What's next
After the user clicks into one of the potential matches, we want to display a list of restaurants that meet their preferences and both of them can go to together.
ReactJS Web App with Firebase Tutorial 2023
Created by Ameya Jadhav
Updated by Ameya Jadhav
Overview
For this Hackpack, we are going to develop a simple online Personal To-Do List - a website where you can log in and keep track of your to-do items. We will be using ReactJS and simple HTML. No CSS will be used in this project, but left as an extension opportunity to this project. In this tutorial, you'll learn the basic process behind making React web apps using Firebase backend for authentication and data storage. Let's get started!
Start create-react-app
-
If you don't have Node.js and npm already installed on your computer, install it from here.
-
We will be using Visual Studio Code in this hackpack. Feel free to use any code editor, but using Visual Studio Code is recommended.
-
Run the command
npx create-react-app hackpack-web-firebase. A directory titled hackpack-web-firebase will be created. -
In the directory, run the command
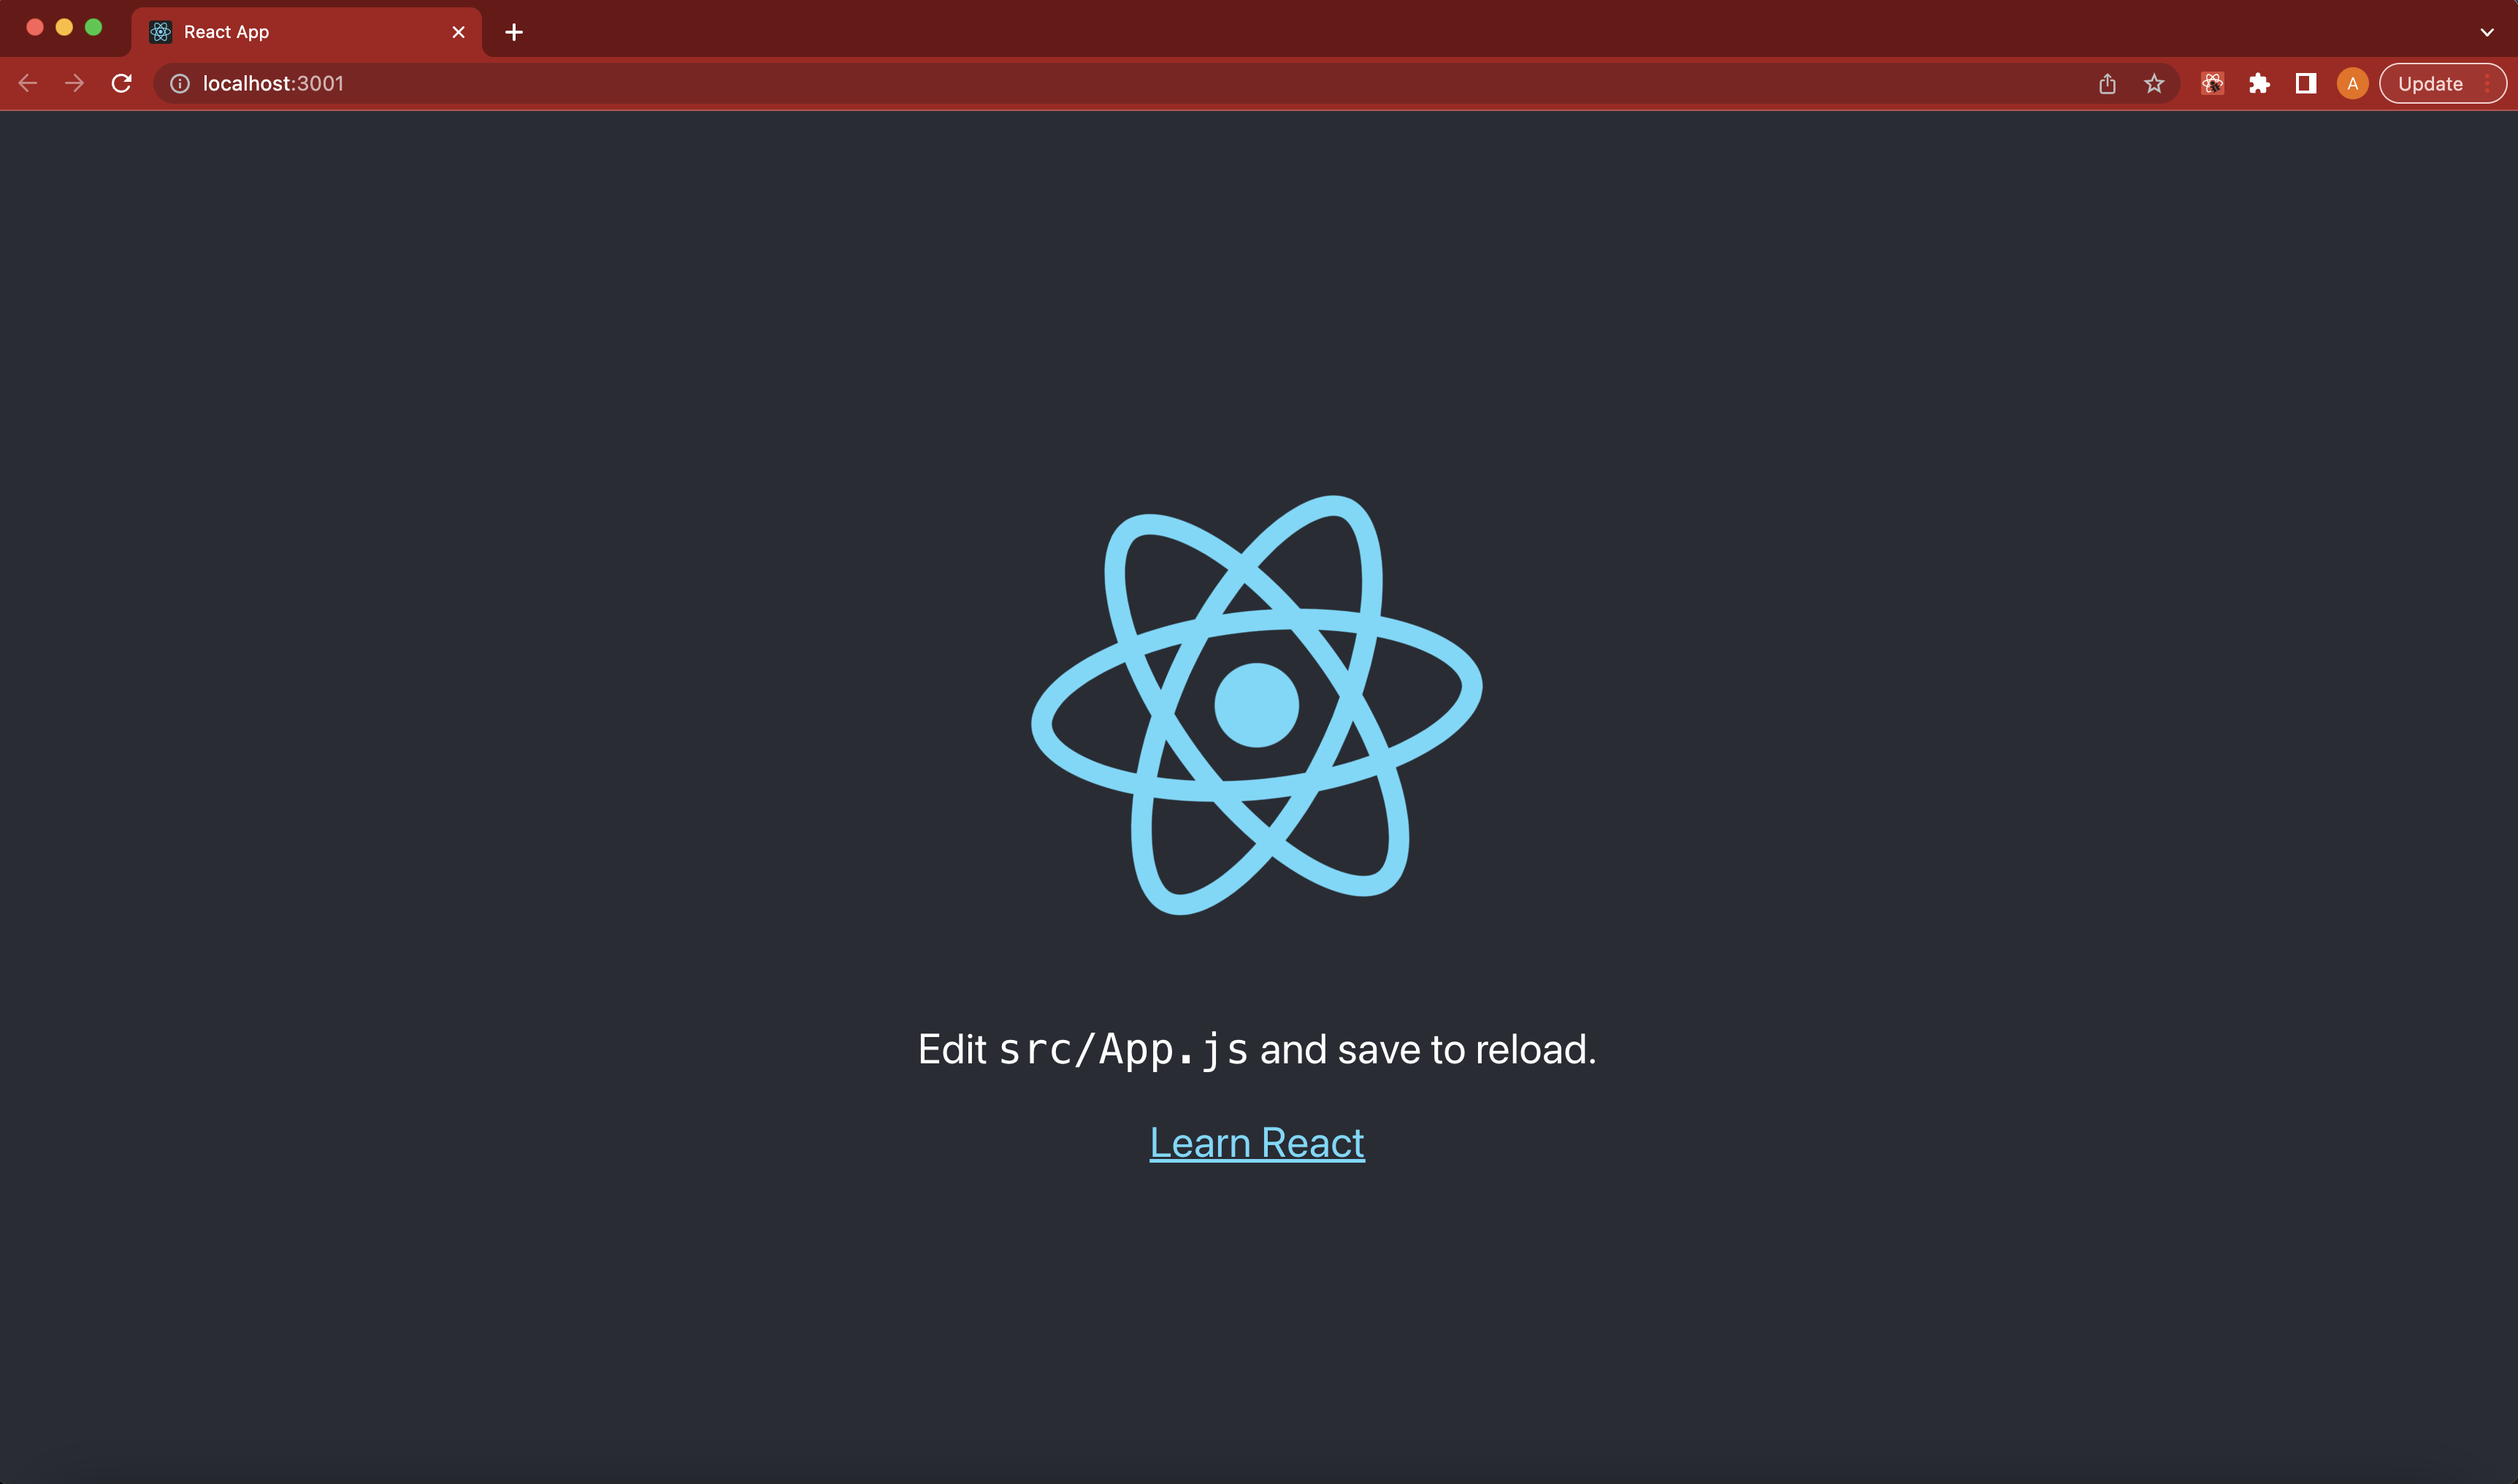
npm start. The create-react-app starter project will be shown in your localhost window (as seen below).
Building template
We will be creating several files and directories before we start coding.
- Create a new
\src\routes\Login\login.component.jsxfile. - Create a new
\src\routes\ToDoListHome\to-do-list-home.component.jsxfile. - Create a new
\src\utils\firebase\firebase.utils.jsfile. - Create a new
\.envfile.
The login.component.jsx file will be our landing page asking the user to log into their account. The to-do-list-home.component.jsx will be our home page after the user logs in where he/she can manage their to-do list. The firebase.utils.js file will be the interface file to connect to our Firebase Authentication and Firestore services. The .env file will securely hold our Firebase tokens and secrets.
Connecting to Firebase
We will now connect our project to our Firebase account. Please go ahead and complete ONLY step 1 from this Firebase docs website. We will complete the other steps together.
- Run
npm install firebasein your project directory to install the necessary Firebase support libraries. - Copy the firebaseConfig keys into your
\.envfile. These keys should be listed on your console as below...
// Your web app's Firebase configuration
const firebaseConfig = {
  apiKey: "AIzaDJSAIDjsmsSIj92SDJIEWmfioadYEI",
  authDomain: "hackpack-web-firebase.firebaseapp.com",
  projectId: "hackpack-web-firebase",
  storageBucket: "hackpack-web-firebase.appspot.com",
  messagingSenderId: "9847851385",
  appId: "1:89798123132:web:sd84d6a3w8f98as1563486"
};
and should be formatted as below in your '.env' file.
REACT_APP_API_KEY=AIzaDJSAIDjsmsSIj92SDJIEWmfioadYEI
REACT_APP_AUTH_DOMAIN=hackpack-web-firebase.firebaseapp.com
REACT_APP_PROJECT_ID=hackpack-web-firebase
REACT_APP_STORAGE_BUCKET=hackpack-web-firebase.appspot.com
REACT_APP_MESSAGING_SENDER_ID=9847851385
REACT_APP_APP_ID=1:89798123132:web:sd84d6a3w8f98as1563486
Setting up Firebase - Authentication & Firestore
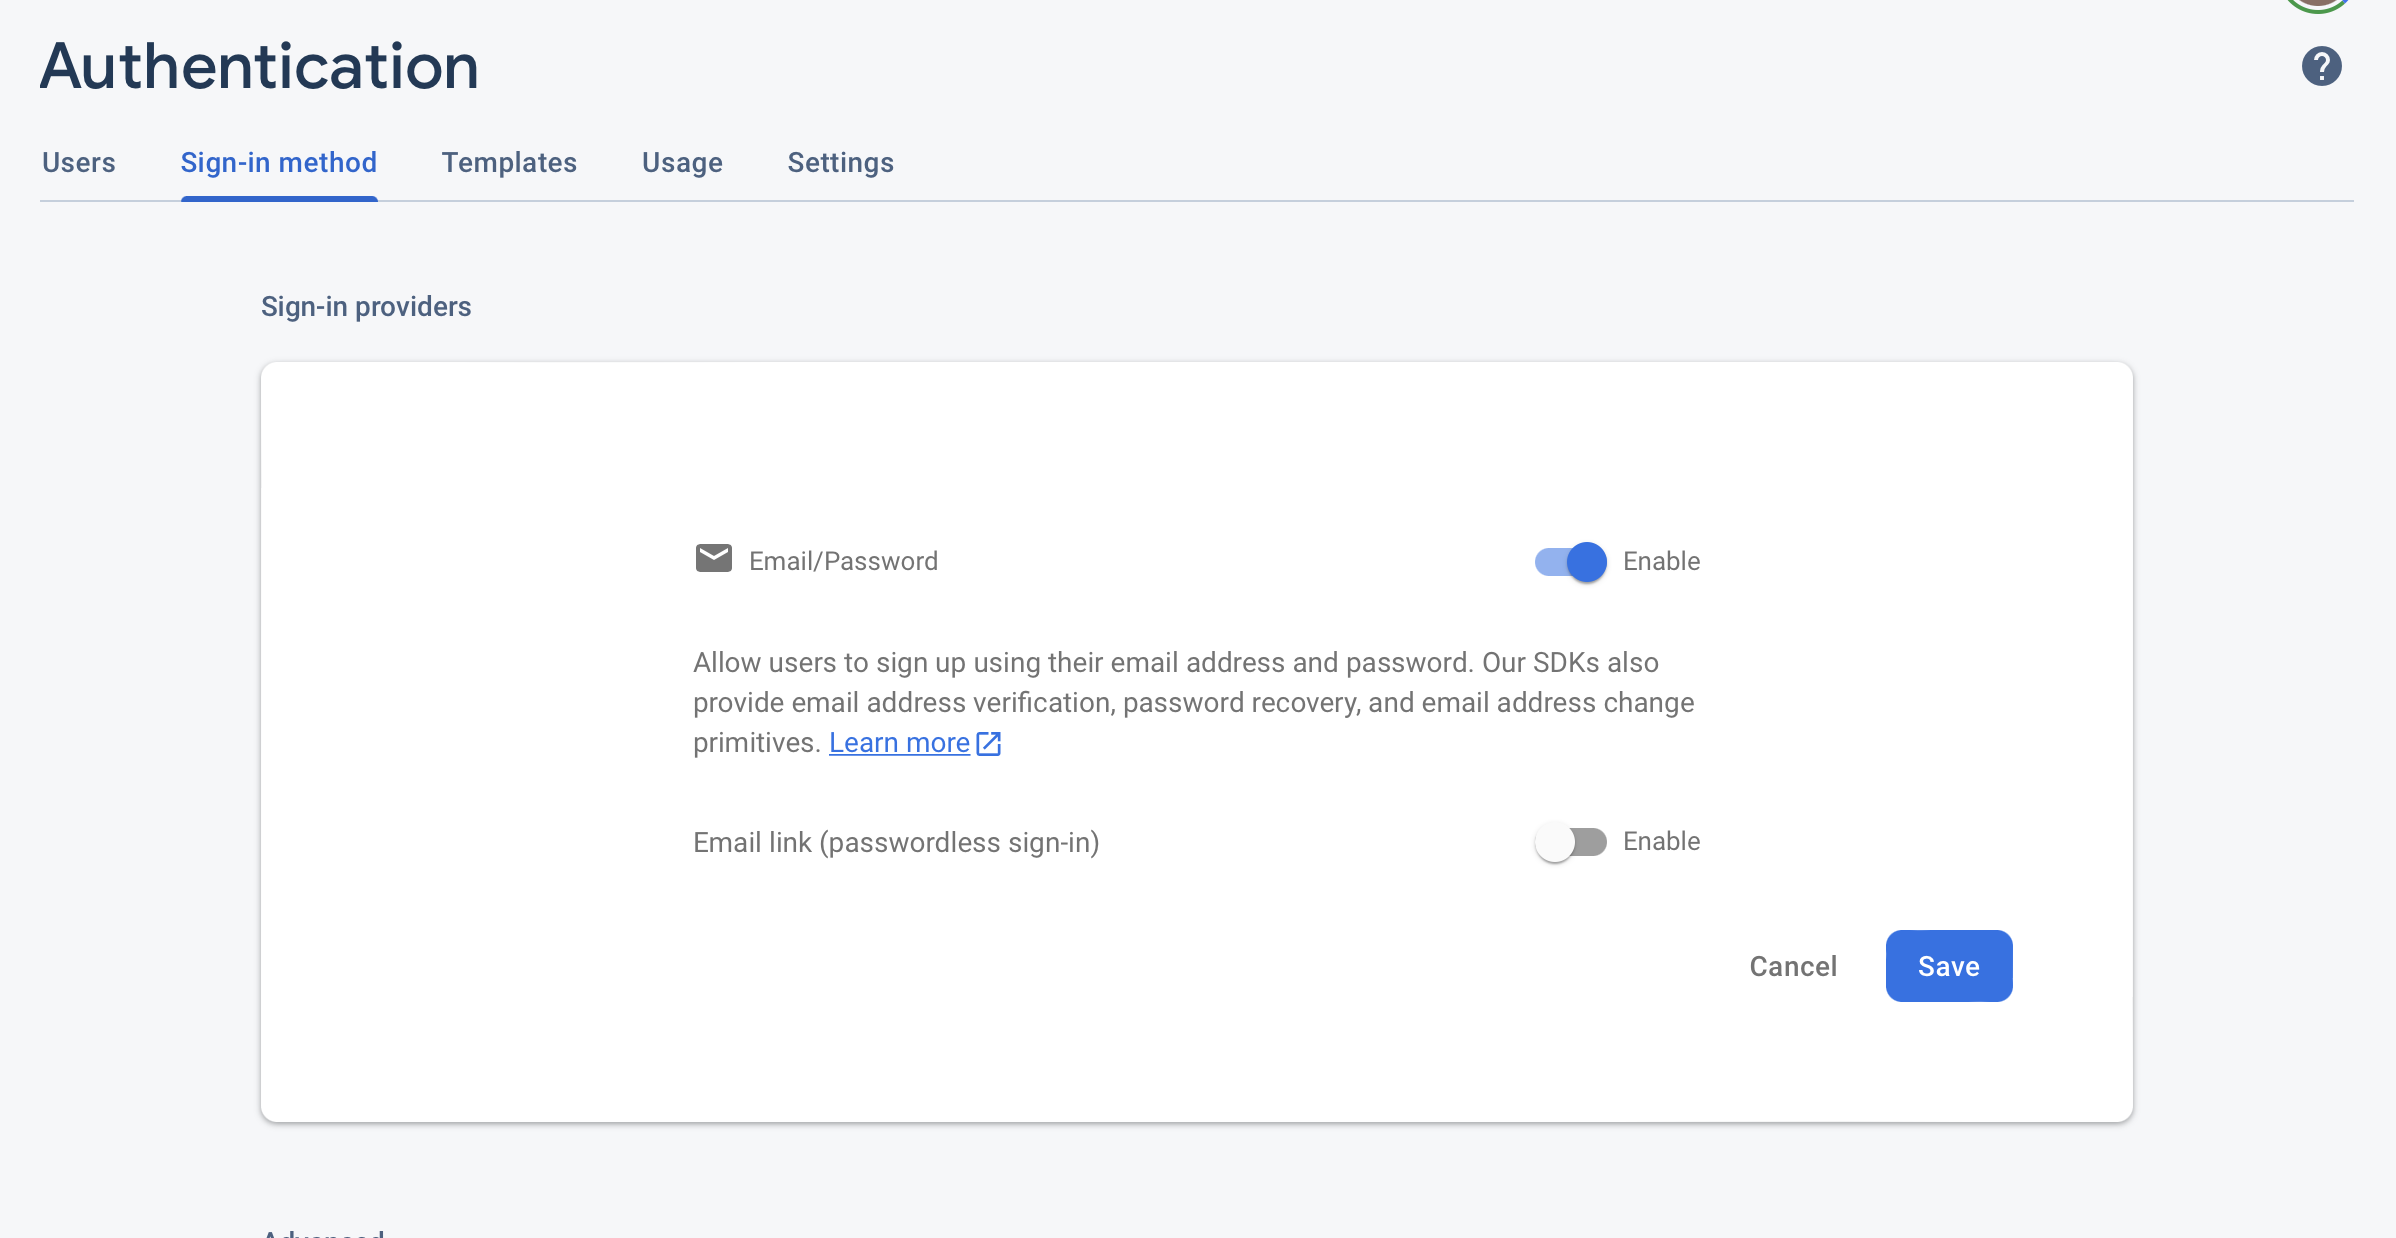
Begin setup of Authentication on Firebase online console...
- Add the "Email/Password" Native provider when asked to set up a sign-in provider
- Do not enable passwordless sign-in
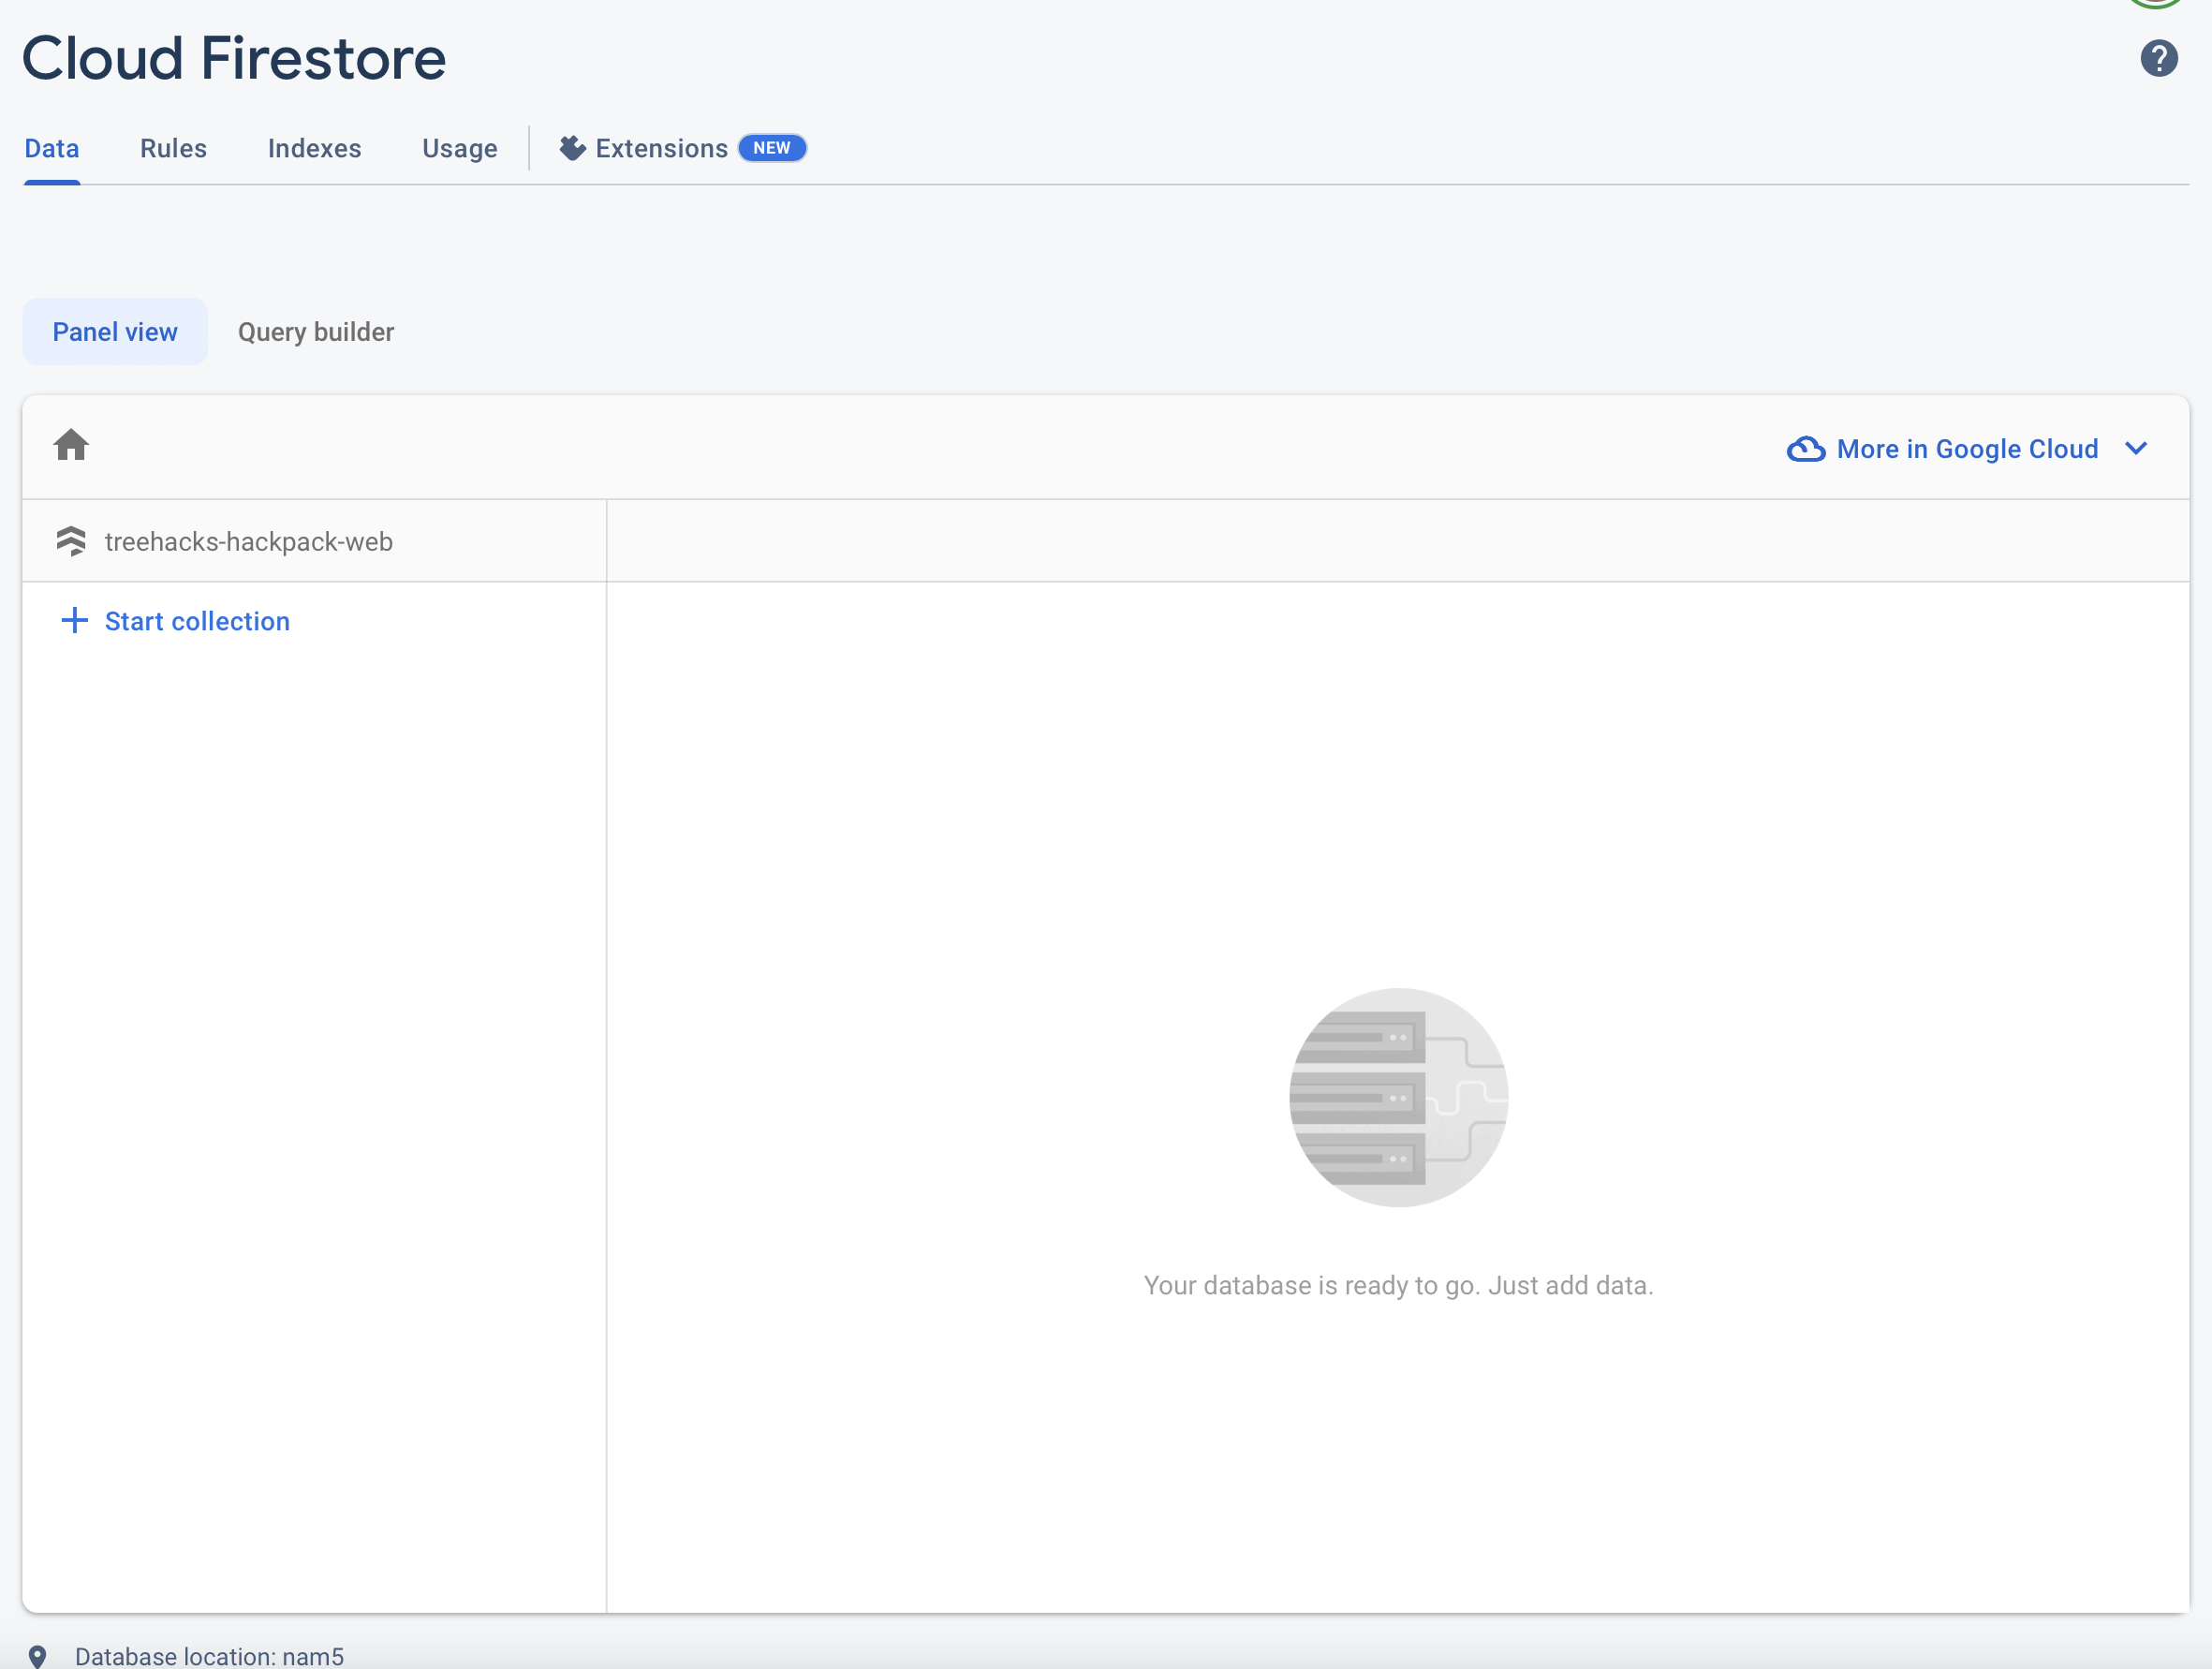
Begin setup of Firestore Database on Firebase online console...
- Click Create Database
- Use all default/recommended options and set up.
Once set up, you should see sometime similar to the below image.
Click on the Rules tab and replace the current database rules with the following, pressing Publish when finished.
rules_version = '2';
service cloud.firestore {
  match /databases/{database}/documents {
    match /{document=**} {
      allow read, write;
    }
  }
}
Now Let's Start Building our Todo-List Web App
Our web app will have two different aspects. One part will be the front-end code to show the web app, and the other part will be the "backend" calls to our Firebase service to authenticate the user and store/retrieve the to-do list.
We will first set up App.js file. App.js is the starting point of our app. The app component is the main component in React which will act as a container for all of our other components. Replace the template code in App.js with the following...
import { React } from 'react';
import {
    BrowserRouter,
    Routes,
    Route,
} from 'react-router-dom';

import Login from './routes/Login/login.component';
import ToDoListHome from './routes/ToDoListHome/to-do-list-home.component';

import './App.css';

function App() {
  return (
    <div className='Root'>
        <div className='App'>
            <BrowserRouter>
                <Routes>
                    <Route path="/" element ={ <Login /> } />
                    <Route exact path="/home" element ={ <ToDoListHome /> } />
                </Routes>
            </BrowserRouter>
        </div>
    </div>
  );
}

export default App;
This code is linking our two other components (Login and ToDoListHome) to specific url paths for our app - / and /home respectively.
Next, we will write the \src\utils\firebase\firebase.utils.js file which will hold our "backend" calls to our Firebase service to authenticate the user and store/retrieve the to-do list. Copy the following code into \src\utils\firebase\firebase.utils.js.
import { initializeApp } from "firebase/app";

import {
    getAuth,
    signInWithEmailAndPassword,
    signOut,
    onAuthStateChanged,
    createUserWithEmailAndPassword
} from "firebase/auth";
import {
    getFirestore,
    getDoc,
    doc,
    updateDoc,
    setDoc,
} from "firebase/firestore";

const firebaseConfig = {
    apiKey: process.env.REACT_APP_API_KEY,
    authDomain: process.env.REACT_APP_AUTH_DOMAIN,
    projectId: process.env.REACT_APP_PROJECT_ID,
    storageBucket: process.env.REACT_APP_STORAGE_BUCKET,
    messagingSenderId: process.env.REACT_APP_MESSAGING_SENDER_ID,
    appId: process.env.REACT_APP_APP_ID,
};

// Initialize Firebase
const app = initializeApp(firebaseConfig);
export const auth = getAuth(app);
export const db = getFirestore(app);

export const logInWithEmailAndPassword = async (email, password) => {
    await signInWithEmailAndPassword(auth, email, password);
};

export const registerWithEmailAndPassword = async (email, password) => {
    const res = await createUserWithEmailAndPassword(auth, email, password);
    const user = res.user;

    await setDoc(doc(db, "to-do", email), {
        items: [],
    });
};

export const getToDoList = async (email) => {
    try {
        const docSnap = await getDoc(doc(db, "to-do", email));

        return docSnap.data().items;
    } catch (error) {
        console.error(error);
    }
};

export const addToDoItem = async (currentItems, email, newItem) => {
    await updateDoc(doc(db, "to-do", email), {
        items: [...currentItems, newItem],
    });
};

export const deleteToDoItem = async (currentItems, email, deleteItem) => {
    var newItems = currentItems;

    const index = newItems.indexOf(deleteItem);

    if (index > -1) {
        newItems.splice(index, 1);
    }

    await updateDoc(doc(db, "to-do", email), {
        items: [...newItems],
    });
};
In this file, we initially register and link our web app to our Firebase console. We do that through the .env keys we previously stored. We have 5 main functions in this file: logInWithEmailAndPassword, registerWithEmailAndPassword, getToDoList, addToDoItem, and deleteToDoItem. Each of these functions does exactly what their name suggests. We will call these functions from our front-end based on user actions.
Next, we will set up our front-end interface for the user. There are two files we will need to write: \src\routes\Login\login.component.jsx and \src\routes\ToDoListHome\to-do-list-home.component.jsx.
Before we write any code, we need to install two more dependencies into our React project. Open a terminal/CMD prompt in the project director and run these two commands.
npm install react-router-dom
npm install react-firebase-hooks
The library react-router-dom will give us the capability to navigate between our two pages (/ and /home). The library react-firebase-hooks will give us the capability to listen and identify if a user has logged in.
Next, we will write our \src\routes\Login\login.component.jsx file which will provide a user login or register options. Copy the following code into \src\routes\Login\login.component.jsx.
import { useState } from "react";
import { useNavigate } from "react-router-dom";
import { logInWithEmailAndPassword, registerWithEmailAndPassword } from "../../utils/firebase/firebase.utils";
const Login = () => {
const [loginEmail, setLoginEmail] = useState("");
const [loginPassword, setLoginPassword] = useState("");
const [registerEmail, setRegisterEmail] = useState("");
const [registerPassword, setRegisterPassword] = useState("");
const navigate = useNavigate();
const handleSignIn = async () => {
try {
if (!loginEmail) {
console.log('Enter email address!');
}
if (!loginPassword) {
console.log('Enter password!');
}
if (loginEmail&&loginPassword) {
await logInWithEmailAndPassword(loginEmail, loginPassword).then(() => {navigate("/home")});
}
} catch (error) {
console.log(error);
}
};
const handleRegister = async () => {
if (!registerEmail) {
console.log('Enter email address!');
}
if (!registerPassword) {
console.log('Enter password!');
}
if (registerEmail&®isterPassword) {
await registerWithEmailAndPassword(registerEmail, registerPassword).then(() => {navigate("/home")});
}
};
return (
<div>
<div className="login">
<h1>Login</h1>
<div className="login__container">
<div>
<label style={{textAlign: "left", fontWeight: 'bold'}}>E-mail Address: </label>
<input
type="text"
className="login__textBox"
value={loginEmail}
onChange={(e) => setLoginEmail((e.target.value).toLowerCase())}
placeholder="E-mail Address"
required
/>
</div>
<div>
<label style={{textAlign: "left", fontWeight: 'bold'}}>Password: </label>
<input
type="password"
className="login__textBox"
value={loginPassword}
onChange={(e) => setLoginPassword(e.target.value)}
placeholder="Password"
required
/>
</div>
<button
className="login__btn"
onClick={handleSignIn}
>
Login
</button>
</div>
</div>
<div className="register">
<h1>Register</h1>
<div className="login__container">
<div>
<label style={{textAlign: "left", fontWeight: 'bold'}}>E-mail Address: </label>
<input
type="text"
className="login__textBox"
value={registerEmail}
onChange={(e) => setRegisterEmail((e.target.value).toLowerCase())}
placeholder="E-mail Address"
required
/>
</div>
<div>
<label style={{textAlign: "left", fontWeight: 'bold'}}>Password: </label>
<input
type="text"
className="login__textBox"
value={registerPassword}
onChange={(e) => setRegisterPassword(e.target.value)}
placeholder="Password"
required
/>
</div>
<button
className="login__btn"
onClick={handleRegister}
>
Register
</button>
</div>
</div>
</div>
);
};
export default Login;
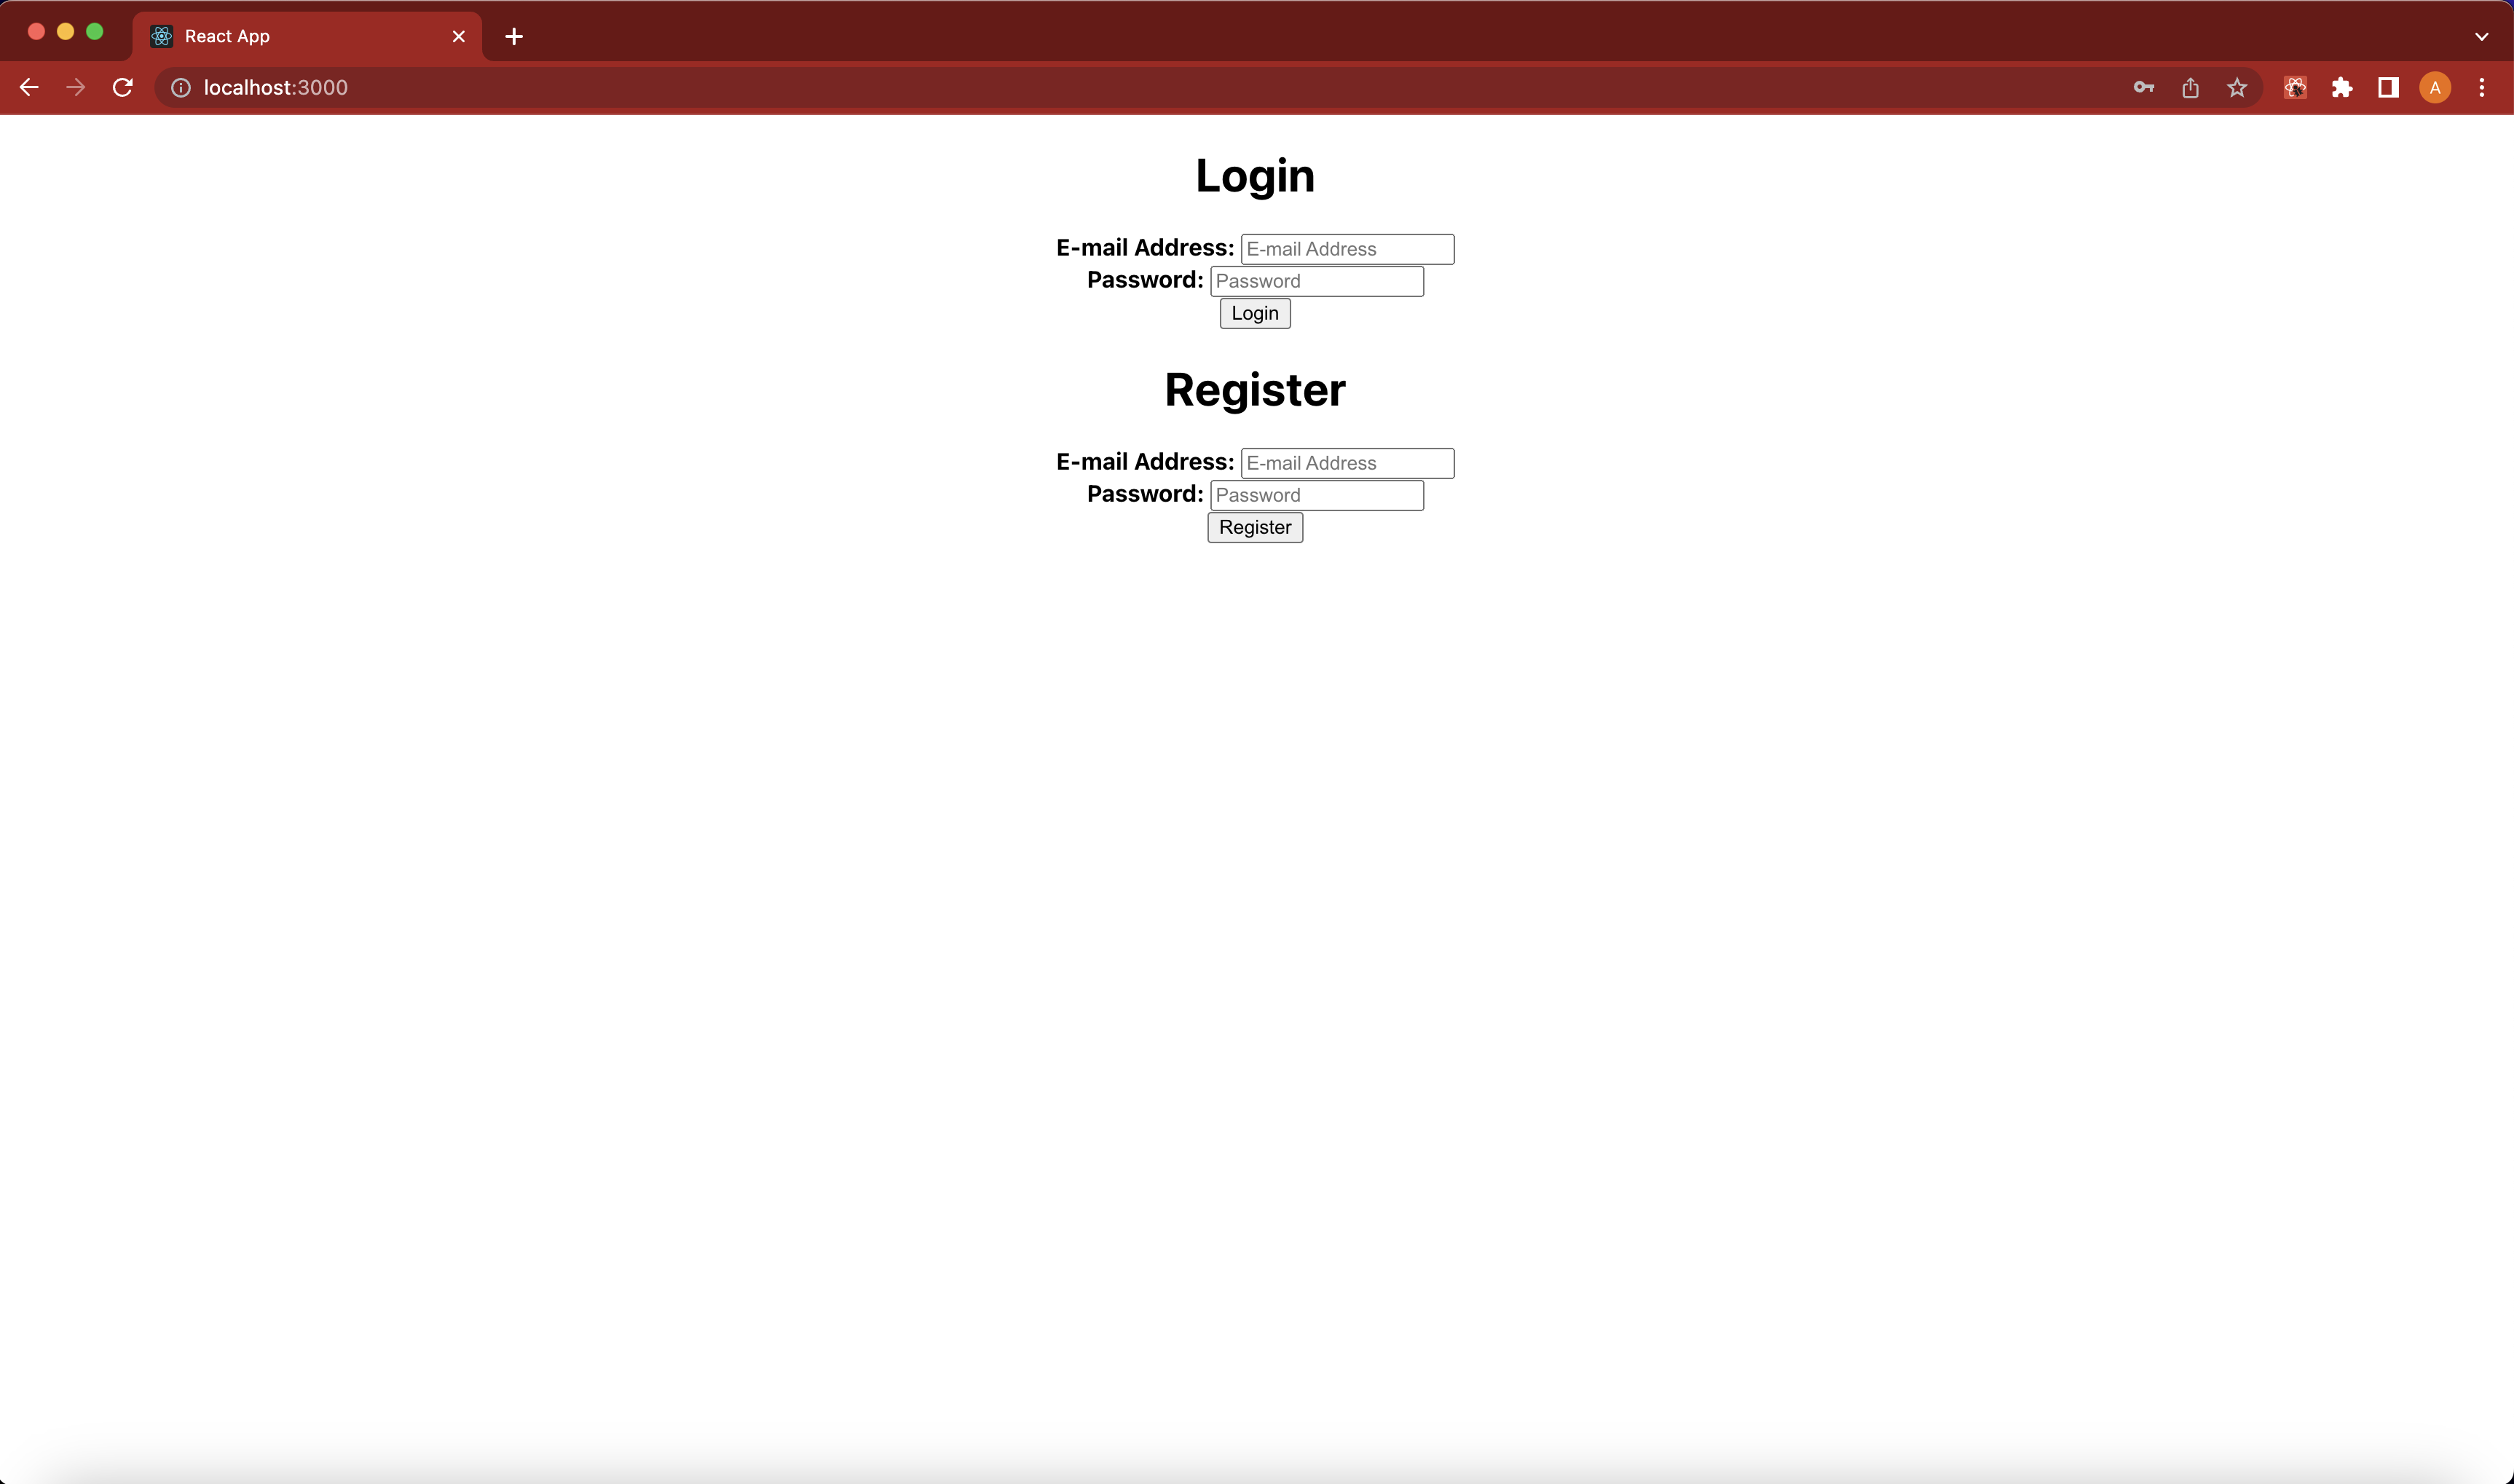
This entire file creates a simple input group for email/password for both login and register. We call our previous logInWithEmailAndPassword and registerWithEmailAndPassword from our firebase.utils file which handles the actual authentication or user creation in our Firebase service.
Once the user is logged in or has created a new account, they are redirected to /home with the actual to-do list. We will write this file next. Copy the following code into \src\routes\ToDoListHome\to-do-list-home.component.jsx.
import { useState, useEffect } from "react";
import { useNavigate } from "react-router-dom";
import { auth, getToDoList, addToDoItem, deleteToDoItem } from "../../utils/firebase/firebase.utils";
import { useAuthState } from "react-firebase-hooks/auth";

const ToDoListHome = () => {
    const [user, loading, error] = useAuthState(auth);
    const [toDoItems, setToDoItems] = useState([]);
    const [newItem, setNewItem] = useState("");
    const [refresh, setRefresh] = useState("");

    const navigate = useNavigate();

    useEffect(() => {
        if (loading) return;
        if (!user) return navigate("/");
    }, [user, loading]);

    useEffect(() => {
        if (!loading) {
            getToDoList(user.email).then((items) => setToDoItems(items));
        }
    }, [user, loading, newItem, refresh]);

    const handleAddNewItem = () => {
        addToDoItem(toDoItems, user.email, newItem);
        setNewItem("");
    };

    const handleDeleteItem = (deleteItem) => {
        deleteToDoItem(toDoItems, user.email, deleteItem);
        setRefresh(deleteItem);
    };

    return (
        <div>
            <h1>To-Do List</h1>

            {toDoItems && user ? (
                <table style={{
                    display: "flex",
                    alignItems: 'center',
                    justifyContent: 'center',
                }}>
                    <div>
                        <thead>
                            <tr>
                                <th>#</th>
                                <th>Item</th>
                            </tr>
                        </thead>
                        <tbody>
                        {(toDoItems) && (toDoItems.map((toDoItem, index) => (
                            <tr key={index}>
                                <td>{index + 1}</td>
                                <td>{toDoItem}</td>

                                <td><button className="ms-1" variant='outline-danger' onClick={() => {handleDeleteItem(toDoItem)}}>x Delete</button>
                                </td>
                            </tr>
                        )))}
                            <tr>
                                <td>{"New"}</td>
                                <td>
                                    <input value={newItem} type="text" id="newItem" name="newItem" onChange={(e) => {setNewItem(e.target.value)}} />
                                </td>
                                <td><button
                                    variant="light"
                                    onClick={handleAddNewItem}
                                    >Add New</button>
                                </td>
                            </tr>
                        </tbody>
                    </div>
                </table>
            ) : <h1>Loading list</h1>}
        </div>
    );
};

export default ToDoListHome;
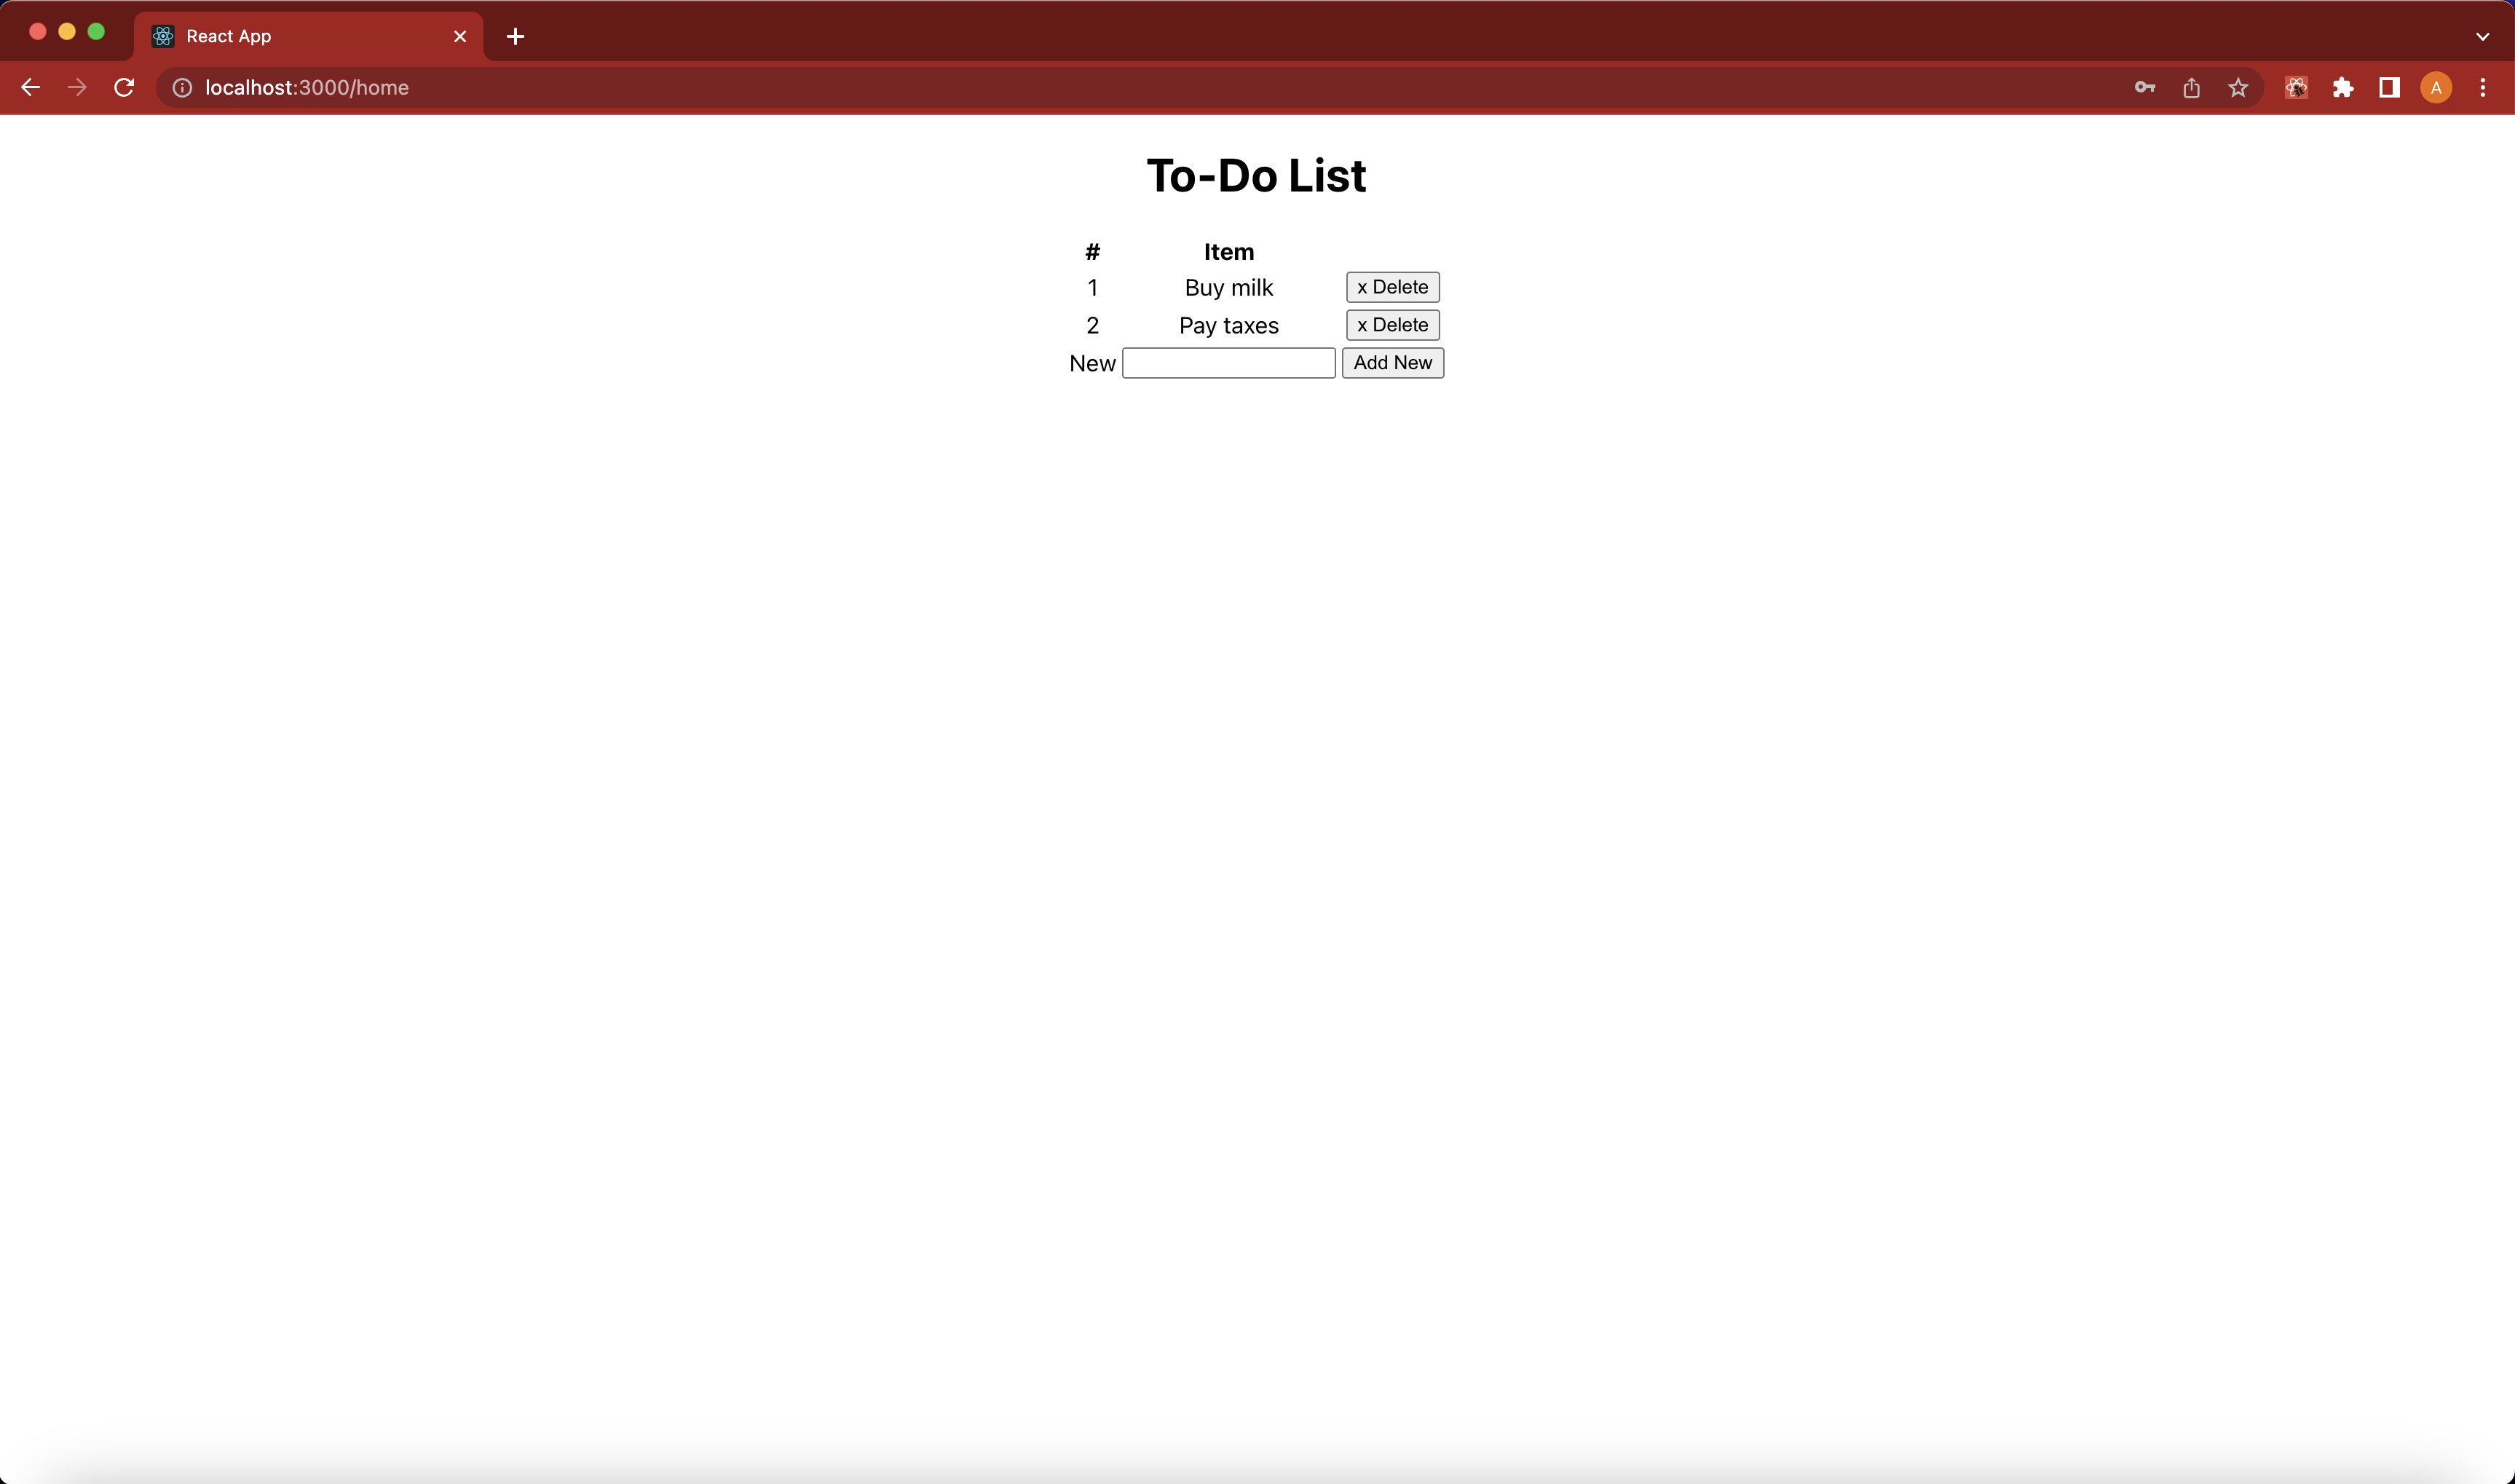
This file creates a simple HTML interface which displays a to-do list (stored in Firebase Firestore Database) and gives the user the option to delete a task from the list or add a new task. We again call the getToDoList, addToDoItem, and deleteToDoItem functions from our firebase.utils file which handle the actual interfacing with our Firebase database.
We are done! Be sure to save all your files and run npm start in your project directory to run the web app. You should see something similar to the below screenshots...
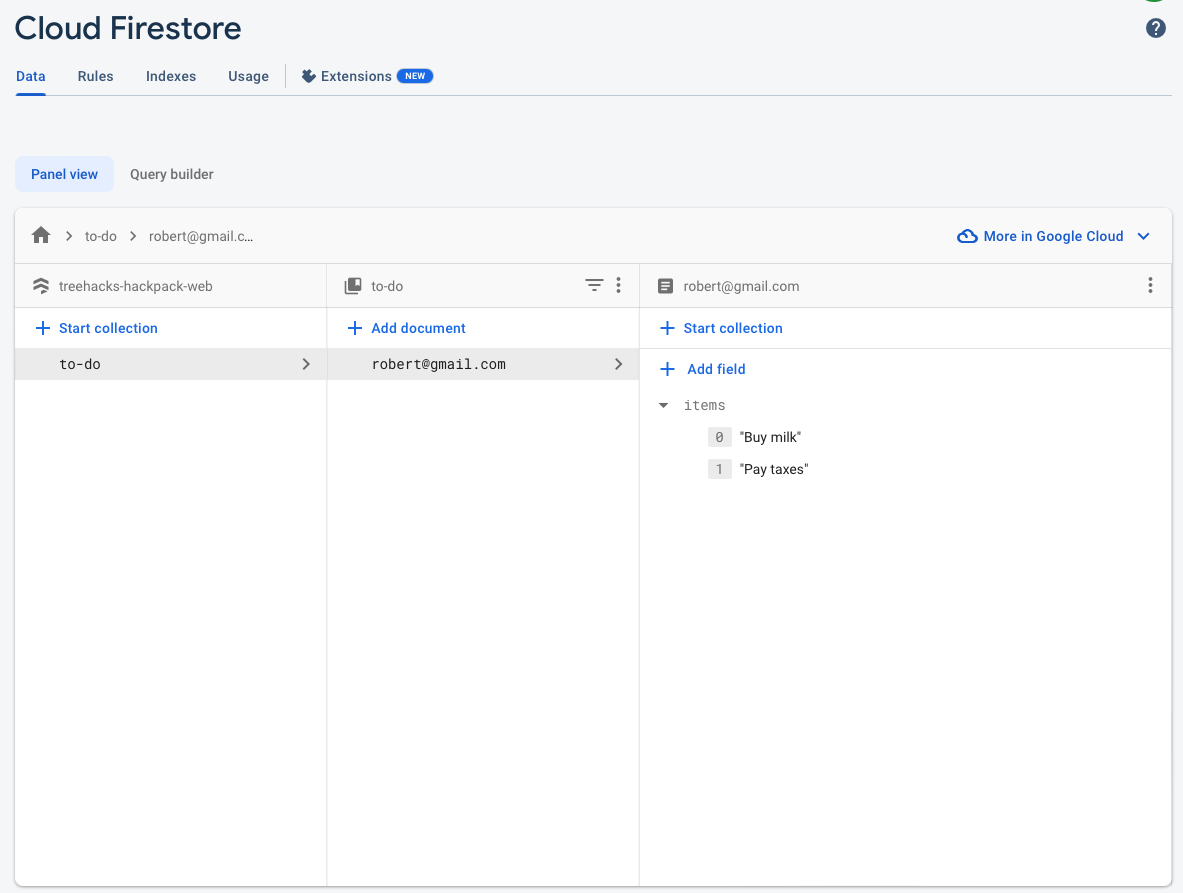
Our Firestore database should be populated and look something like this...
What Next
There are lot of things that you can do on top of this application.
- Extended Firebase Authentication Providers : Use other authentication flows besides email/password.
- React Redux : Use more complex application states for authentication and other data.
- Style with CSS : Of course, make the project look better with CSS styling!
More Resources
License
MIT
About HackPacks 🌲
HackPacks are built by the TreeHacks team and contributors to help hackers build great projects at our hackathon that happens every February at Stanford. We believe that everyone of every skill level can learn to make awesome things, and this is one way we help facilitate hacker culture. We open source our hackpacks (along with our internal tech) so everyone can learn from and use them! Feel free to use these at your own hackathons, workshops, and anything else that promotes building :)
If you're interested in attending TreeHacks, you can apply on our website during the application period.
You can follow us here on GitHub to see all the open source work we do (we love issues, contributions, and feedback of any kind!), and on Facebook, Twitter, and Instagram to see general updates from TreeHacks.
Analysis
View
Metric
- 13
- 3


Figures cover GitHub contributors during the hackathon window. A co-authored commit counts in full for each author, so per-member totals add up to more than the whole-team figures.
Technology
- CSSIn code
- ExpressIn code
- FirebaseIn code
- HTMLIn code
- JavaScriptIn code
- ReactIn code
- Tailwind CSSIn code
- TypeScriptIn code
8 of 8 appear in the indexed code.
AI coding agents
No AI coding agent signals were found in this repository.
Detected from committed agent config files and commit authorship. Absence of a signal is not proof an agent was unused.
Codebase size
Source size
52 KB
Source files
18
Counts recognized source files only; vendored directories, binaries and lockfiles are excluded, so this is smaller than the repository on disk.
Repository
sheeens/treehacks
33 files · 2.4 MB · @ 1ca7d52
Structure
Interface
1 file · 3%Screens, components and styles rendered to the user.
API & routing
4 files · 12%Request entry points: routes, handlers and controllers.
Application logic
9 files · 27%Domain rules, services and shared utilities.
Supporting
Layers are inferred from where files sit in the tree, not from reading the code. A project that names its directories unconventionally will read oddly here — open the file browser to check anything the diagram implies.
Languages
- JavaScript36%
- Markdown35%
- CSS25%
- HTML3%
- TypeScript0%
Share of indexed source by file size. Binary and vendored files are excluded.
Dependencies
package.json
npm · 15- @emotion/react
- @emotion/styled
- @mui/material
- @testing-library/jest-dom
- @testing-library/react
- @testing-library/user-event
- express
- firebase
- react
- react-dom
- react-firebase-hooks
- react-router-dom
- react-scripts
- web-vitals
- +1 more
Declared in the repository’s manifests at the indexed commit. A declared package is not proof it is used, and runtime dependencies are listed first.
This project’s features have not been analysed yet.
Export this project's context (description, README, evidence, key source files) to chat with an AI agent elsewhere.